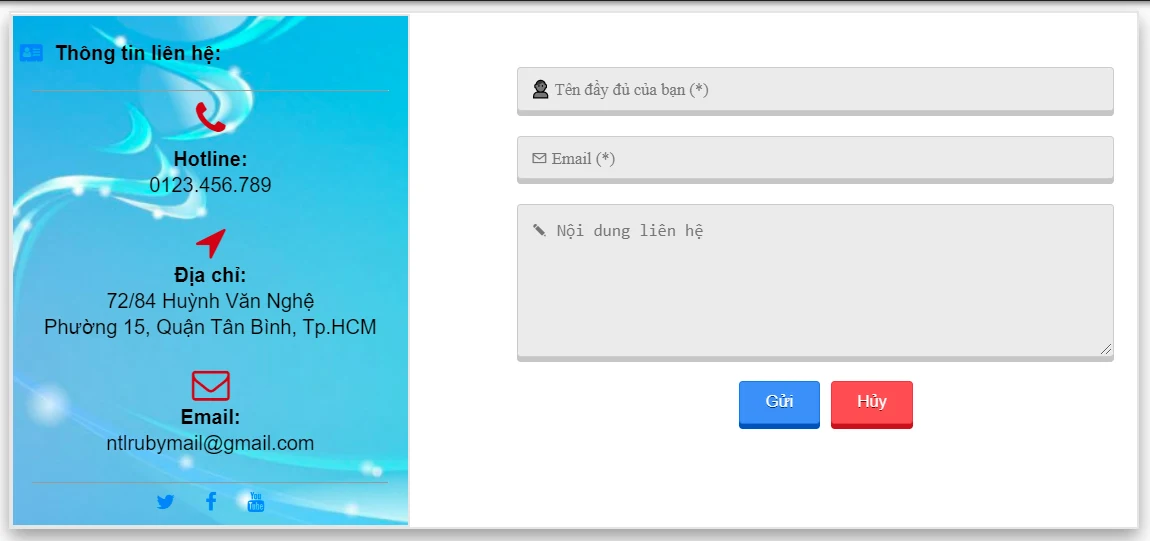
Mẫu form liên hệ đẹp cho Blogspot:
I - Đặt ở trang tĩnh:
</head> nhé.<div class="khung"
style="font-family:Arial, sans-serif;">
<!--phần thông tin liên hệ-->
<div class="trai">
<div><h3><span style="font-size:
medium;"><i aria-hidden="true" class="fa
fa-address-card" style="color: #0084ff; margin: 0px
5px;"></i> Thông tin liên hệ:</span></h3></div>
<hr size="1" style="margin:0 auto;"
width="90%"/>
<div style="text-align: center; line-height:
130%;">
<span style="font-size: 30px;"><i
class="fa fa-phone" aria-hidden="true" style="color:
#ca0000; margin:7px 0;"></i></span><br /><span
style="font-size: 16px"><b>Hotline:</b><br
/></span><span style="font-size:
16px;">0123.456.789</span><br /><br />
<span style="font-size: 30px"><i
class="fa fa-location-arrow" aria-hidden="true"
style="color: #ca0000;"></i></span><br
/><span style="font-size: 16px"><b>Địa chỉ:</b><br
/></span><span style="font-size: 16px;">72/84 Huỳnh
Văn Nghệ<br />
Phường 15, Quận Tân Bình, Tp.HCM</span><br
/><br />
<span style="font-size: 30px"><i
class="fa fa-envelope-o" aria-hidden="true"
style="color: #ca0000;"></i></span><br
/><span style="font-size: 16px"><b>Email:</b><br
/></span><span style="font-size: 16px;">[email protected]</span><br
/><br />
<hr size="1" style="margin:0 auto;"
width="90%"/>
<a href="https://twitter.com/NTLRUBY"
target="_blank" title="Twitter"><i
aria-hidden="true" class="fa fa-twitter" style="color:
#0084ff;margin: 7px 10px;"></i></a>
<a href="https://www.facebook.com/NTLRUBYfanpage/"
target="_blank" title="Facebook"><i
aria-hidden="true" class="fa fa-facebook"
style="color: #0084ff;margin: 7px 10px;"></i></a>
<a
href="https://www.youtube.com/channel/UCvcqxn_1UdkU0cHHvaQJZ3w"
target="_blank" title="Youtube"><i
aria-hidden="true" class="fa fa-youtube" style="color:
#0084ff;margin: 7px 10px;"></i></a>
</div>
</div>
<!--Form biểu mẫu liên hệ-->
<div class="phai">
<div class="contact-form-box">
<form name="contact-form">
<input class="effect-6" id="ContactForm1_contact-form-name"
name="name" placeholder=" Tên đầy đủ của bạn
(*)" required="" size="30" type="text"
value="" style="font-family:'Helvetica', FontAwesome, sans-serif, Arial, FontAwesome"/><br />
<input class="effect-6"
id="ContactForm1_contact-form-email" name="email" placeholder="✉
Email (*)" required="" size="30" type="text"
value="" style="font-family:FontAwesome"/><br />
<textarea class="effect-6" cols="25"
id="ContactForm1_contact-form-email-message"
name="email-message" placeholder="✎ Nội dung liên hệ"
required="" rows="5"></textarea><br />
<input class="submit"
id="ContactForm1_contact-form-submit" required=""
type="submit" value="Gửi" />
<input class="reset" type="reset"
id="ContactForm1_contact-form-reset" value="Hủy" />
<div style="max-width: 222px; text-align: center;
width: 100%;">
<div
id="ContactForm1_contact-form-error-message">
</div>
<div
id="ContactForm1_contact-form-success-message">
</div>
</div>
</form>
</div>
<script type="text/javascript">
//<![CDATA[
if (window.jstiming)
window.jstiming.load.tick('widgetJsBefore');
//]]>
</script>
<script
src="https://www.blogger.com/static/v1/widgets/2271878333-widgets.js"
type="text/javascript"></script> <script
type="text/javascript">
//<![CDATA[
if (typeof(BLOG_attachCsiOnload) != 'undefined' &&
BLOG_attachCsiOnload != null) { window['blogger_templates_experiment_id'] =
"templatesV1";window['blogger_blog_id'] =
'7352238635556498134';BLOG_attachCsiOnload('');
}_WidgetManager._Init('//www.blogger.com/rearrange?blogID\x3d7352238635556498134','www.ntlruby.com/','7352238635556498134');
_WidgetManager._RegisterWidget('_ContactFormView', new
_WidgetInfo('ContactForm1', 'footer1', null,
document.getElementById('ContactForm1'), {'contactFormMessageSendingMsg': 'Đang
gửi...', 'contactFormMessageSentMsg': 'Tin nhắn của bạn đã được gửi.',
'contactFormMessageNotSentMsg': 'Không thể gửi tin nhắn. Vui lòng thử lại
sau.', 'contactFormInvalidEmailMsg': 'Cần nhập địa chỉ email hợp lệ.',
'contactFormEmptyMessageMsg': 'Trường tin nhắn không được để trống.', 'title':
'Contact Form', 'blogId': '7352238635556498134', 'contactFormNameMsg': 'Name',
'contactFormEmailMsg': 'Email', 'contactFormMessageMsg': 'Message',
'contactFormSendMsg': 'Send', 'submitUrl':
'https://www.blogger.com/contact-form.do'}, 'displayModeFull')); //]]>
</script>
</div>
</div>
<style>
.khung {
margin:0 auto;
max-width: 900px;
border: #e5e5e5 2px
SOLID;
box-shadow: 0px 7px
15px 0px rgb(0 0 0 / 40%);
}
.phai {
margin: 2% 0;
}
.trai {
height: 407px;
border: #e5e5e5 2px
SOLID;
background:
url(https://blogger.googleusercontent.com/img/b/R29vZ2xl/AVvXsEiNhrsG3ni-jgjd045rhfUUvxErXI3PpXNJRL04OMKB8kkjuo-LCrn0kQVrbs620GCjjh6vWDwT00Q0yNbt2xzDhyphenhyphenKATIeFhM0OuYWDUzTmZkoDg6nH7Yyl7SAY5_Yb8TLDpJBgbIs0Pco/s1200/hinh-nen-mau-xanh-dep-nhat-25.jpg)no-repeat
center;}
@media only screen
and (max-width: 480px){
.khung{height:
810px;}
.phai{width:100%;}
.trai{width:100%;}
}
@media only screen
and (min-width: 481px){
.khung
{height:410px;}
.trai{float:
left;width:35%;}
.phai{float:
right;width:55%;}
}
.contact-form-box{float: left; width:92%;margin:20px
auto;padding:0;}
#ContactForm1_contact-form-name,
#ContactForm1_contact-form-email{width: 100%;height:auto;margin: 5px auto
15px;padding: 10px;background: #ebebeb;border: 1px solid #ccc;color:#777;border-radius:3px;box-shadow:
0px 4px 0px 0px #c7c5c7;}
#ContactForm1_contact-form-name:focus,
#ContactForm1_contact-form-email:focus,
#ContactForm1_contact-form-email-message:focus{background:
#fffff7;outline:none}
#ContactForm1_contact-form-email-message{width: 100%;height:
100px;margin: 5px auto;padding: 10px;background: #ebebeb;border: 1px solid
#ccc;color:#777;border-radius:3px;box-shadow: 0px 4px 0px 0px #c7c5c7;}
#ContactForm1_contact-form-submit {display:block;height:
35px;float: left;color: #FFF;padding: 0 20px;margin: 0px 5px;cursor:
pointer;background-color:#4d90fe;box-shadow: 0px 4px 0px 0px #0f53c0;border:1px
solid #357ae8;border-radius:3px;text-shadow:0px 1px 0px
#00317f;position: relative;left: 37%;} #ContactForm1_contact-form-submit:hover
{background-color:#357ae8;}
#ContactForm1_contact-form-submit:active
{position:relative;top:2px;box-shadow: 0px 2px 0px 0px #0f53c0;}
#ContactForm1_contact-form-submit:focus{outline:none}
#ContactForm1_contact-form-reset {display:block;height:
35px;float: left;color: #FFF;padding: 0 20px;margin: 0px 5px;cursor:
pointer;background-color:#fe4d4d;box-shadow: 0px 4px 0px 0px #c00f0f;border:1px
solid #e83535;border-radius:3px;text-shadow:0px 1px 0px
#7f0000;position: relative;left: 37%;}
#ContactForm1_contact-form-reset:hover {background-color:#d12020;}
#ContactForm1_contact-form-reset:active
{position:relative;top:2px;box-shadow: 0px 2px 0px 0px #0f53c0;}
.submit {float: left;position: relative;left: 39%;}
.reset {float: left;position: relative;left: 41%;}
#ContactForm1_contact-form-error-message,
#ContactForm1_contact-form-success-message{width:
100%;margin-top:35px;text-align:left}
@media screen and (max-width: 768px){
.contact-form-box{width:100%;}
#ContactForm1_contact-form-name,
#ContactForm1_contact-form-email,#ContactForm1_contact-form-email-message{width:
96%;}
}
@media screen and (max-width: 480px){
#ContactForm1_contact-form-name,
#ContactForm1_contact-form-email,#ContactForm1_contact-form-email-message{width:
94%;}
}
II - Trường hợp đặt không đặt ở trang tĩnh
footer. Tuy nhiên một Website vẫn rất cần một trang liên hệ riêng biệt. Vì vậy các bạn có thể tìm một vị trí thích hợp ở footer, rồi đặt nó vào. Sau đó tạo một trang liên hệ với nội dung thông tin theo ý của mình, trong đó sẽ trỏ xuống form liên hệ ở cuối trang như mình làm ở các bạn tham khảo.


Facebook